RoboCup Junior 2001
RESCUE Building Plans
Please excuse the poor quality photos!
Parts list.
- 1 piece of glass, 9 inches by 12 inches, approximately 1/4 inch thick
This is a standard size picture frame and can be easily acquired
at a department store -- just keep the glass and discard the frame.
- 2 end pieces of 1x3 inch wood, 8 5/8 inches long
(American "1x3" is 2 1/2 inches wide and 3/4 inch thick)

- 2 side pieces of 1x4 inch wood, 12 inches long
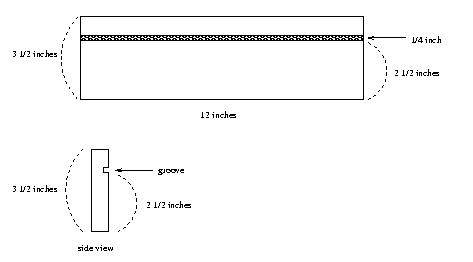
(American "1x4" is 3 1/2 inches wide and 3/4 inch thick)
This will be grooved along its length, to support the glass.
The groove should be wide enough so that you can slide the glass into it.
The bottom of the groove should be 2 1/2 inches from one end of the wood.


- 2 triangular ramp supports, cut from 1x3 inch wood, as below:


- 1 ramp of hardwood (1/4 inch thick), 10 1/4 inches by 10 inches
Cover the ramp with white paper.
Put green electrical tape along on the two 10 1/4 inch edges.
Put a straight line of black electrical tape running up the middle of the ramp,
parallel to the green edges.

Assembly Step 1.
Attach the ramp supports to one of the end pieces, using 4 screws as shown.

Assembly Step 2.
Create a box by attaching the two end pices to the two side pieces,
using 8 screws as shown (top and bottom in 4 places indicated).
Make sure that the grooves are on the inside of the rectangle and are
lined up with the top edge of the end pieces.

Here's a photo of the assembly so far.

Assembly Step 3.
Now you can slide the glass into the box, fitting it into the grooves in
the side pieces, resting on top of the end pieces.
The photo, belows, shows the glass being slid from the back of the box
(where the ramp supports are at the other end).

Assembly Step 4.
Finally, place the ramp on top of its supports.

The lower end of the ramp will touch the floor -- aligning the black line
with the end of maze.

Finished product.
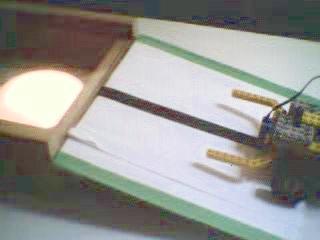
Here's the robot in action. We've placed a light source under the glass.
The robot has a light sensor pointing down at the floor.
When the robot reaches the top of the ramp, the sudden brightness of the
light source will be detected by the robot.

back to RESCUE Rules


